2/27/11

Entropy

Or, "It's always easier getting things apart".

I am ready.  I am ready for the machining.

When last we met, I was in the garage taking the heads off.  Well, I had to put them back on temporarily, as well as the intake manifold so I could lift the engine with the hoist once again.  I did this to remove the flywheel off the back of the engine.  In order to really get the bolts off the flywheel I had to wedge a large screwdriver into the teeth of the flywheel and brace it against the rest of the engine so it wouldn't move when I was torquing on the bolts.  I'd have taken a picture of it, but both hands were full at the time.

Flywheel came off, put the engine back on the stand.  Took off all the external bits, like the motor mounts, main pulley etc.  Rotated the engine over, so the bottom is facing up, then took off the oil pan to reveal the crankshaft.
Note the tool stuck in the crankshaft.  It's there to prevent the crank from turning when I was undoing the bolt that holds the harmonic balancer (round orange thing on the far right in the above photo) to the crank.  Also note the oil pump (tall black thingy poking up on the far left in the above photo).

To get the harmonic balancer off, I had to buy a special tool that fits onto the bolt holes previously occupied by the main pulley assembly.  Then you screw in a large main bolt that presses into the crankshaft and pulls off the harmonic balancer.
Well what I didn't know is that the crankshaft bolt that was in there before, was very close in size to the large black bolt in the above picture, so when I was twisting it in there, it was getting threaded into the crank... oops
Don't do it this way.
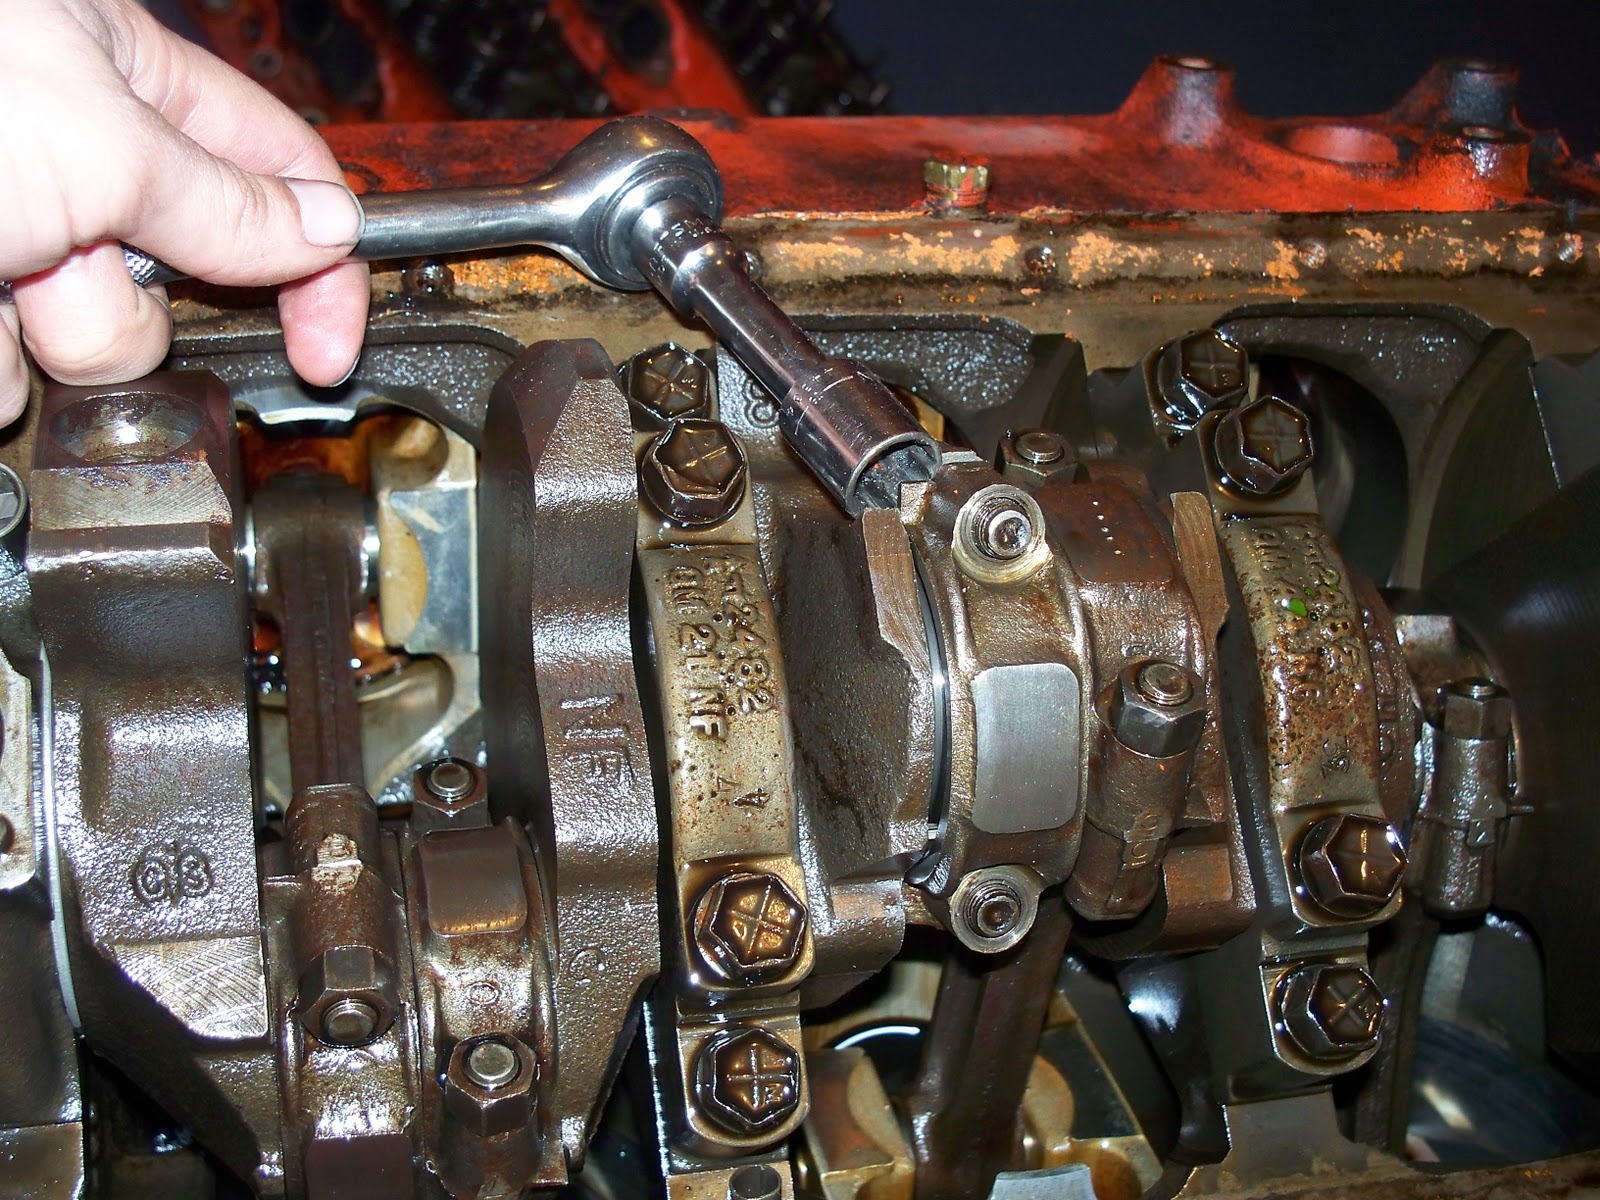
I then reinstalled the original bolt into the crankshaft and used the three bolts on the outside of the "duck's foot" (aka harmonic balancer puller) to do the pulling, simply leveraging the tool against the bolt.  Like so.
Screwing in those three brass-colored bolts, about 3 full turns each in a loop until the balancer came off.

Then I removed the power steering fluid reservoir.
After that the timing chain cover came off, and the cam-shaft timing chain sprocket (it's the bigger one... I forgot to take a photo).  Then I could pull the cam shaft out.  See it on the green towel there?
The cam shaft is like the brain of the engine, it tells the engine when to "breathe in" fresh air and "exhale" bad air.

Then it was onto taking the pistons out of the cylinders.  With the engine still upside-down, you can rotate the crankshaft (using the same bolt that held the harmonic balancer on the front, and a socket wrench) until two pistons are at "bottom dead center" that is they are all the way down in the cylinder.  Then undo the two nuts that hold the bottom of the piston rod to the crankshaft.
When those two bolts are off, I had to put the wrench against a small flange on the cap, and hit the wrench with a hammer a few times to dislodge the cap from the rod.
Cap removed.
Next, I slipped on two lengths of 3/8" fuel line around the exposed bolts that are still attached to the rod. Placed the wooden end of a hammer against the bottom of the piston and hammered it out of the cylinder.
The fuel line acts like a shield protecting the cylinder wall from getting damaged by the extraction of the pistons and rods.
Just seven more to go.
The part of the rod that connects to the crankshaft has a bearing that lines the part of the rod that would contact the crankshaft.  Sometimes those bearings wear out.  For example, if you can see some brass color on a bearing, it's been worn out.
Repeat the procedure to get all the pistons out.  Now, if you intend to reuse the pistons and rods you currently have, you'll want to label each one with a number punch.  Label the rod in the first cylinder 1, the second 2 etc.  Also you'll want to label the caps of each as well, so you don't get them mixed up.

Here's a diagram of the piston numbers and firing order (shown in the circle).
I'm getting all new pistons and rods, so I didn't care much.  I need new parts because they will bore out each cylinder to be bigger than they originally were.  The machine shop will make enough room for 383 cubic inches of displacement (total volume the piston will travel through), from the 350 I currently have.
All pistons out.
Finally I had to remove the main caps that hold the crankshaft to the engine.  There are two kinds: 4-bolt main, and 2-bolt main.  I have the former.  This means that for each of the three center main caps that hold the crankshaft to the engine there are four bolts.  Take a look here.  Once I had all of those caps out (and they also have corresponding bearings).  I was just about done.  I lifted out the crankshaft...
Then pulled out the "water jacket" plugs (see the brass colored discs in the above link).  Each cylinder is surrounded by a jacket of water to keep it cool.  The engine block is a hollow chamber that allows for water to circulate around the parts that need to be kept cool.

Then removed some of the "oil gallery" plugs, but I stripped one.  Finally, I put a 1/4" wide 3' long steel rod down in through the newly opened oil gallery plug hole (which runs the length of the engine) in order to push agains the tap-in oil plugs on the front of the engine, and hammered them out.

I now am ready to take the parts to the machine shop.

Does anyone know what to do with lifters/pistons/crankshafts/camshafts etc. that you're not using anymore?  I mean they have to be worth *something*, yeah?

2/26/11

Round and Round She Goes

A "rotating assembly" (aka rotating package) is all the spinning/moving parts of an engine that make up the bottom part of the engine.  That is: the pistons, the connecting rods, the crankshaft, and various other bits (like piston rings, and crankshaft bearings etc.).

This is the rotating package I'm thinking of getting.

2/22/11

The Machinists

I've been reading my books this weekend.  This one is way better than this one.

The former comes with a hip check-list to better keep track of your rebuild.  And the DVD is really good also.

I went to the machine shop, and talked to some nice old crusty machinists.  They said
$600-$900 for all the deck planing, boring, honing, head rebuilding etc.  If the rods don't clear the case correctly, it could be an additional $300 in grinding time.  So, worst case scenario, about 1200 bucks.  I don't really have a basis for comparison.  Is that a good price?

Then I went to NAPA and picked up some shop rags, a drip pan (way overdue for that one), a harmonic balancer puller, gasket scraper, and some length of fuel line to use as a bolt-shield for when I pull the pistons out (I'll take pictures of that when I do it).

Bonus: Got my taxes done today, had a good cry.

2/18/11

Namesake

The books came this morning.  In paging through them briefly, I noticed that, apparently, you're supposed to mark which lifters came from what openings. Same with the push rods... oops.

I don't think it matters too much for me, because I'll likely replace all of those parts with new ones.  Still, not something I was aware of.

2/16/11

2/14/11

Off With Their Heads!

The factory AC unit needed to be removed.  It just takes up a lot of space in the engine bay and there are kits that fit under the dash now-a-days.  Here's where it used to be.
Just jutting in there and wasting space.
So I took some bolts/nuts off and then ripped it out.
Since it's not going back in there, I'm not sure what to do with it.  I'm just going to toss it unless someone wants it.  Lemme know if you or anyone you know would want such a thing.

Anyway, here's what's left
There's still the passenger side casing left, but I can't figure out how to remove it without taking body panels off.

Next I went to work on the engine.  I started taking off the intake manifold, but I couldn't get too far because the allen wrench I was using was too long to get on some of the bolts.  So I took it to NAPA and they sold me a smaller one that fit great.
Got the intake off without much drama.

Took off the rockers next, and then pulled out the lifters.  Some of them were way down in their seats.  Using my magnet-on-a-stick helped a bit.
Taking off the heads proved to be problematic.  The bolts were on there pretty tight, so I improvised.
Mechanical advantage!
Took the handle from the engine hoist and attached it to a wrench, Erick: 1, Bolts: 0.

With the heads off I got my first good look at the pistons and cylinders.  Oh, by the way, a bunch of water comes out when you undo the bottom bolts of the head, and a bunch more when you remove the head... plan accordingly.
Lots of carbon built up on the pistons.  And the heads.
Next, I'll take all the bits off the engine block.  For reference here's what it looks like as of now.
Driver's side.
Front.
Passenger's side.
Got the intake and heads off this weekend.  Mission: accomplished.

2/6/11

No-op

Didn't get anything done this weekend :(
Tied up loose ends before my trip to Vegas, however :)

More next weekend.

2/1/11

Serendipity, Pt.2


I should preface this part of the story by saying I watched this series of videos on YouTube about removing an engine before attempting to do the same.

Saturday morning I set off to pick up an engine hoist.  I had contacted the seller earlier in the week, but she informed me there was another person ahead of me who was interested, but lucky me, that person bailed out, so they wanted me to look at it on Friday, then changed the time to Saturday at the last minute.  Which worked out great because a) I got paid Friday night (midnight), and b) my buddy P.S. brought a friend's truck (unbeknownst to me) to my house.

P.S. and I went over there, and the guy didn't have change.  He was asking $175, so I offered him $160, and he took it!

So it seems the car-gods had conspired to allow for me to have the money, means, and people to haul that hoist over to my garage.

The first order of business on Saturday was to remove the drive shaft.  You can see it running from the end of the transmission (at the middle of the picture) to the differential (at the top left of the picture).  There are a couple of U shaped bolts that hold the drive shaft to the differential.

Once you loosen those U bolts you can slip the whole drive shaft forward into the transmission in order to remove it (that tip I got from the above linked videos... God bless the Australians).

Here's a better picture of the U bolts and how the fit on the shaft.
When that was out we plugged the tail of the transmission with this.
Now the trick would be to remove the engine mount bolts from the front of the car, lift up the engine enough to unbolt the engine from the transmission then the engine out of the car, followed by the transmission.

There are two bolts that hold the engine to the engine mounts, one on either side of the engine: driver's side and passenger side (see the picture of the engine bay below).

So P.S. went to work unbolting the engine from the bell housing.  When it occurred to us... well not me so much as J.W., that we needed to prop up the front part of the transmission before we lifted the engine out, otherwise it'd crash to the floor once we'd decoupled the engine from the transmission.  And it just so happened that I had a long piece of 2x4 that would work great as a brace.  So we used it like this:
Which allowed us to remove the engine bolts, and the bolts holding the transmission to the engine and we were about to lift the engine out when I remembered that the flywheel (on the engine) was still attached to the torque converter (on the transmission).  So I got under the car and unbolted the three bolts that held it together, however J.W. had to use a wrench to turn the crankshaft on the front of the engine to turn the flywheel so I could access the bolts individually.  That's effing team work.

Then attaching the hoist to the lift plate we pulled the engine out.
Preparing the hoist.
Houston, we have separation.
She's cleared the engine mounts.
You don't see that everyday.
With the engine free we bolted it onto the engine stand I bought last weekend using bolts from Home Depot.  We just took some of the bolts we removed from the bell housing down there to find ones that were longer... it turned out the ones we got were too long, and we needed to cut them to size with a hacksaw.  So, for those following along at home, buy a hacksaw when you get these bolts (total cost: right around $10).
A trick to make life easier is to bolt the part adjustable frame onto the engine while it's on the hoist, and just lower that as an assembly onto the engine stand.

Next, we had to lift the transmission out, but we didn't have a good idea how to do that, until J.W. jury rigged the engine lift plate to the transmission... brilliant!
And we lifted the tranny out through the engine bay also.
Out.
All done by 5pm Saturday.  For less than the $175 dollars I had planned on spending.  Three guys, plus a little bit of prep work, buying the right parts, doing the homework, some good ideas (none of them mine, thanks J.W. and P.S.) and a good dose of luck and we achieved our goal ahead of schedule and under budget.
Knuckle buster.
Next steps: sell the transmission, as it's just in my way; and start stripping the engine down.